For nearly my entire career, I’ve been using the Apache2 web server as my main solution for web hosting. For many years, Apache2 was the number 1 web server and the obvious choice. However, the competitor nginx has been on the rise and a few years ago, took the #1 spot away from Apache.
I am now working on a new web project and decided to give nginx a try. I run my setup on a newly installed Debian 11 virtual machine that I acquired from Digital Ocean.
The process turned out to be pretty straightforward.
Initial steps
When you start with a fresh Debian 11 (or any other Linux distro) install, it is a good idea to create a new user first:
Create new user and add it to the sudo group
sudo adduser evgeni
Make sure to use a good password.
sudo adduser evgeni sudo
This will add the new user to the sudo group. After this, you will not need the root user anymore.
Login with normal user and lock root access
Logout and login back using your newly created user.
Run a command to lock user access.
sudo usermod --lock root
From this point on, we will be using a normal user and run root commands using the sudo prefix.
Update the system
sudo apt-get update && sudo apt-get upgrade -y
Reboot the VM if the kernel is updated.
Installing firewall
If you are running a server that is accessible from the internet, like a virtual machine on Digital Ocean or Linode, for example, at this point before anything else, it is a good idea to install a firewall. You have a few choices, but the easiest one is to go with ufw. Let’s install it first:
sudo apt-get install ufw
Firewall configuration
Configuring the ufw firewall is really easy. If you are using ssh to access your virtual machine, you want to open a hole for the ssh port like this:
sudo ufw allow 22/tcp
Now the firewall can be enabled:
sudo ufw enable
Installing nginx
sudo apt-get install nginx
After the nginx web server is installed, it will be activated immediately. Next, we can test browsing from the terminal window:
curl localhost
In order to access the server from the Internet, you will need to open a hole for port 80/http in your firewall.
sudo ufw allow 80/tcp
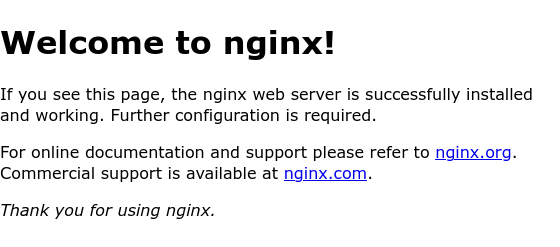
Now you can try accessing the default web page from your browser by navigating to http://your_server.com or http://YOUR_SERVER_IP. You should see a message like this if successful:

Using virtual hosts
Now, let us create our first virtual host pointing to a working directory. For the purpose of this example, I will use a directory that I created in my home:
mkdir /home/evgeni/public_html
Next, let us create an index.html file within this directory
echo "Hello virtual hosts" | tee /home/evgeni/public_html/index.html
nginx stores the site configs in the /etc/nginx/sites-available folder, let us create a new file called domain.com within this directory and modify it as follows:
server {
    listen 80;
    listen [::]:80;

    server_name domain.com;

    root /home/evgeni/public_html;
    index index.html;

    location / {
        try_files $uri $uri/ =404;
    }
}
Now, let’s switch the default site to show our public_html/index.html file. Similar to Apache, nginx uses symlinks in the /etc/nginx/sites-enabled folder.
Let’s create a new one:
sudo ln -s /etc/nginx/sites-available/domain.com /etc/nginx/sites-enabled
Make sure that you create a symlink to your config file (which is domain.com in this example) and not the directory.
Now let’s remove the default config symlink.
sudo rm /etc/nginx/sites-enabled/default
Now, after restarting nginx:
sudo systemctl restart nginx
You should see the index.html from the ~/public_html folder:

And that’s it! You’ve set up your nginx web server on a fresh Debian 11 VM. In the next blog posts, I will dive deeper into nginx configurations such as ssl certificates, wsgi applications, etc. Stay tuned!